Showing posts with label Publishing. Show all posts

Wednesday, 6 February 2019

Beginning the year activities for your students

I had a few teachers towards the end of last year that asked me for some ideas of how to start the year with their students. Here are some of my ideas.

  1. Create a Google Form ‘All about Me’ graph the results. Here is an example.
  2. Make changes to photos, cartoonise them and use them as avatars 
  3. Use the Concept Cartoon idea to discuss contentious issues or to set class rules. If you would like a copy of this email me info@jsharp.co.nz 



 4. Use Adobe Draw (or any other drawing programme) on iPads to draw their self portraits, (make sure the last layer is transparent) find photos of places of where they would like to visit or favourite places they have visited and then add the downloaded image .

5. There are many different types of digital cartoons, use these for setting rules and routines of the class.
Storyboard that


or Make Beliefs Comix


6. Make an iMovie where students prepare questions at the beginning of the year for each other (these could be their goals for the year, what they think the year is going to be like) and then do one at the end of the year and make a comparison or talk about if you achieved your goals for the year. Students will get a great kick out of seeing how much they have changed in a year.

7. Pechakucha for presenting to class about themselves, 10 slides 20 secs each all about them, pictures only.


8. Students can create a Time magazine cover about themselves. I would recommend that you find examples to show them yourself and put them together in a presentation. When you search for 'Time' covers on Google you can view some that are not suitable for students. With this example below, you place your photo so it covers the grey box, then you move it to the back so that the text comes forward. If you would like a copy of this email me info@jsharp.co.nz 

Friday, 10 February 2017

Experimenting with Rocketium

Rocketium is very easy to use. The only thing you can't do is adjust how the graphics appear with a free account. Make sure you make all graphics landscape rather than portrait, as you can see in mine that some of the portrait graphics are cut off. This is a great tool for younger students to use when publishing their inquiry or writing work. It could also be used as a great reflective tool.


Friday, 2 September 2016

Using Google Slides for Writing Motivation

This was an idea that I used to do with PowerPoint. Now I do it with Google Slides. It is a mixture of digital and analogue technologies. Students can create their own authentic writing motivation by taking photos of their environment and then using graphics to make a fictional imaginative montage. Change the view of the slide into Notes, add some lines and print out. Student's then publish their writing under the picture. See instructions below


Wednesday, 21 May 2014

Quick Publishing Idea

I was working with a Year 0/1 teacher who has iPads and uses them in her class for reading and maths but not for writing yet.
I suggested that she download Book Creator and use it as a quick publishing tool.

I asked her to get one child's writing book. I opened up Book Creator, tapped on the + button, selected camera and took a  photo of the child's drawing.

I then tapped on the + and selected text and typed in the student's story. We then called over the student and got her to read her story to us while I recorded it in Book Creator by tapping on + and selecting Add Sound.


This is something that can be done quite quickly when conferencing with the student.
Once you have recorded all the pages you want, this can then be shared and opened with iBooks.
  • this can then become an independent reading activity within iBooks
  • or a shared book mirrored to a tv, IWB or projector where you can annotate
    • full stops 
    • capital letters
    • features of text
  •  presented via projector to syndicate or school assembly
  • if students have a book each, it will show the progress of writing and drawings over a year, it can be a great assessment tool and can be shared as an ePub file to parents who can open and view if they have a smart phone/iPad/tablet or software on their computers that open ePub files
  • a next step is to video the child reading their story and adding the video to the page as well

Wednesday, 27 February 2013

Observations Week 6 Clevedon

Rebbecca's students are working well with the Digital Toolkit and enjoy making their own choices about how they present their work. A particular favourite is Pic Collage


Some of the other  tools they have used are
  • Kerpoof
  • Pages
  • Comic Life
  • one child has downloaded  Instacollage and uses that (I like the way students are finding apps that work for them)
Rachael had set several tasks using Google Docs today. I suggested setting up an 'Expectations' chart with the tasks so that the students would know what they were going to have to do next. She added this to her wiki along with the success criteria.
We showed the students how they could add a shortcut to the class wiki by bookmarking on the iPad home page.


Rachael's students did a journal play in a different way today. They went outside and went over it twice, and then they made a Puppet Pals movie with all 7 children participating by reading their parts. One of the students had only one line to say in the play so she made the characters move when the students read their parts. They came back in and shared through the Apple TV. The rest of the class thoroughly enjoyed the play. The children said their learning from that activity was that they could hear that they needed to add more expression to their voices and they needed to speak loudly and fluently.

Saturday, 10 November 2012

Starting younger children reflecting

Kids Journal ($1.29 for iPad)
Diary writing, reflective journal for young students.


This is a great app to start young children reflecting on their day. It can be used for  for individual iPad owners and you can set up class sets of journals on one iPad.


Tap on the empty Journal box to add a new journal.
Add a photo, type in your name and choose a colour for your book.


Choose a Mood Picture
Choose a location picture


Choose a weather picture
Choose the 'Photo of the day'
Type in your reflection/journal/diary entry


These pages can be exported by tapping on the Paper Dart icon. They can be exported to iBooks, Kindle, Notability, Evernote and several more.


So it takes 5 steps to make a Journal entry
  1. Choose a mood
  2. Chose a location
  3. Choose the weather
  4. Choose a photo
  5. Type in your entry
The next step could be Kidblog which is an Internet based student blogging platform and which is now available as an app
Kidblog (Free for iPhone/iPod Touch; Free for iPad)


And then there is Blogger, if your students have a Google account through Google Apps for Education then they have a 'Blogger' account. It is a great way for students to blog as there are no distractions on the app, all they can do is type a title, type a post, insert a photo and post!

5 year old Chloe, doing her favourite thing...blogging on Blogger

    Thursday, 14 June 2012

    PowerPoint motivating writing tip

    Find a photograph background and then insert into a blank PowerPoint page. In this example one of my schools are studying dinosaurs and paleontology, so I suggested taking photos of the field or playground.


    Then go to Insert - Clipart and select clipart that has white backgrounds. If you have white background appear on your graphic you will have to make it transparent by clicking on 'Remove Background' in the Format menu.


    Click on the Home button and choose speech bubbles from the Insert Shapes menu.


    To add writing lines click where it says 'Click to Add Notes' which is just below your main screen. Hold down your Shift key and minus - key on the keyboard. This will make lines. Once you have made several lines, press Ctrl A (Command A for Mac) to highlight all of the lines. Change the font size to about 36. Don't worry if you see no change yet.


    Go to File - Print
    Click on Full Page slides and change to Notes.
    Check to see if your lines are the right width.
    Print.


    Students can now use this as a motivator for their drafting and editing. You could print out another copy in colour and use that as the final publishing.

    For younger students you could make a PowerPoint template with the photo background embedded in the Master page. Go to View - Master - Slide Master, insert a background photo in the usual way and delete the slide master frames that show up, click on Close or Close Master.
    Then save as a template by going to File - Save As, select PowerPoint Template under the Format dropdown menu, name it and click Save.

    Tuesday, 12 June 2012

    Photo and Text apps #1

    There are many different types of photo apps available.
    This is a first of a series of posts I will make on photo apps.
    In this post I will be looking at apps that allow students to quickly present their photos with writing.

    Halftone: (iPad and iPod Touch)
    Add Effects: Yes
    Text:  Speech bubbles, narrative boxes
    Share: as a photo to library, send in an email

    1. Take a photo or use a photo from the Library
    2. Choose a paper style and layout
    3. Add balloons and stamps
    4. Select a font
     How could you use this in the classroom?
    • Great for students who only write a few sentences

     Comic Life (iPad only)
    Add Effects: No but great variety of templates to choose from
    Text: Speech bubbles, narrative boxes
    Share: Dropbox, WebDAV, email, Photo Library


    1. Create drawings in apps such as...
    2. Choose a template in Comic Life
    3. Insert graphics or photos
    4. Add text to speech bubbles and text boxes
    5. Add more pages, add templates that are different in the number of slides that they display
    How could you use this in the classroom?
    • break up narratives and tell the story in different shapes and parts of the page
    • use a mixture of photos and drawings
    • choose templates that complement the telling of the story
    • use one photo templates for students who cannot write a great amount
    • create timelines
    • character or plot analysis
    • Procedural writing
    • posters
    • digital story writing

       Comic Touch: Free version has a watermark, has all other features of the Full version (iPhone version, no full iPad version)
      Add Effects: Limited effects of Smudge, Bulge, Dent,  Stretch or light
      Text: Speech, Thought, Whisper, Exclaim and Caption bubbles
      Share: Photo Library, email


      1. Choose a photo from the photo library or take a photo with the camera
      2. Add Speech, Thought, Whisper, Exclaim and Caption bubbles
      3. Tap on the Share button and save to Photo Library or email

      How could you use this in the classroom?
      • Use the photos as motivation for the writing, what are the students saying to each other
      • record what people could be thinking
      • great publishing tool for limited writing

      Tuesday, 5 June 2012

      Notes

      The Notes app comes pre-installed on your iPad or iPod Touch.
      The first line of your note becomes the title.

      It has very basic capabilities but still very useful.

      So how can it be used in an educational context?

      If you don't have a Word Processor on your iPad or iPod Touch then you can use 'Notes' for drafting a story. I have had students use the iPod touch very successfully for drafting their writing.
      It can then be sent as an email for printing out to be edited or opened in the Word Processing programme on your computer. (Tip: before printing out, set the Line Spacing to at least 2.0 in your WordProcessor so there is space for editing.)
      It can also be used as a basic publishing tool. If students have drafted, edited and conferenced their writing in their book, then they can type it up onto the Notes app and then email it for printing out. It can then be decorated or illustrated by hand.

      This app is great on field trips as well. Use it for writing notes.

      I have had students practise their spelling words on it, much more fun then writing them out in their spelling books.

      The notes app has a great search function on it. Type in a word and it will show all notes with that word in it. Great for finding notes on a common theme.

       No Distractions
      What is great about using Notes in these different ways is that students can't get distracted with other tools like changing fonts and styles and adding graphics and backgrounds.

      All they can do is 'write'!

      Wednesday, 21 March 2012

      Student Digital Toolkit

      It is becoming more apparent as teachers and students get more familiar with the online  digital tools and devices that there needs to be some management of these. Some teachers still get tied up with the old adage that all the students in the class has to 'produce a product at the end using this tool'.
      It doesn't have to be so...I encourage teachers to have a 'Teacher Digital Toolkit'
      This is an example of a basic one
      For more teacher tools go to this website.

      Students need a Digital Toolkit as well. I am working on 2 different websites at the moment, one is called
       Publishing Ideas
      • ways to publish using online and offline tools
      • variety of ways to publish i.e cartoons and comics

      and the other is called Web 2 tools and Widgets
      • tools and widgets that will enhance your blog or wiki
      • photo presentation tools
      Set up a student toolkit so that students know what is available and what they can use. In consultation with you, you both can decide what is the best tool for their learning.
      The  following could be an example of a Student Digital Toolkit

      Monday, 1 August 2011

      Primary Wall

      Just came across this link on twitter today 

       "@Elle_Gifted  Alternative to Wallwisher for primary sts shared by @plnaugle http://primarywall.com/ at Tech Smackdown #RSCON3."

      Primary Wall looks like a great alternative to Wallwisher especially as it seems to be 'broken' quite often. It has a few different features from Wallwisher and is very easy to use.
      Here is an example of what it looks like


      And you can choose to send your notes to Wordle

      And here is a list of ideas you could use Primary Wall and Wall Wisher for...


      Thursday, 19 May 2011

      Publishing Junior stories

      One of my junior teachers has had a frustrating time trying to publish her Year one students' stories. She uses Word and has a frame for her Picture box and a text box below that for the story. After she has saved 24 pages of this format and typed in her students' stories, text boxes and frames have moved and she has the tiresome task of moving all the boxes in place again. She asked if there was a way of anchoring the text boxes, but unfortunately there is not. So I came up with the idea of making a PowerPoint Template.
      1. Open up PowerPoint, choose plain template
      2. Go to File - Page Setup and change Page Orientation to Portrait
      3. Next choose a Layout, choose one with a Text box space, she deleted the title
      4. Next resize the text box and add a square shape for the picture box, move them to where you want them, set your font and size
      5. Remove the bullet points from text by clicking on the bullet point button on toolbar
      6. Last step is fix the rulers, because when you remove the bullet point the second line of text indents and you need to fix that


      Once you have the template looking the way you want it, then duplicate the slide by clicking on it once in the slide tray, Press Ctrl D or Command D however many times you need copies.


      Go File - Save as and Choose Template from the dropdown menu. Make sure that you know where it is saving to as when you choose 'Template' it defaults back to Template folder.

      Now when this teacher publishes her students' work, she can open up this template, type in the stories, no text boxes will move around and she can print it out for the students to illustrate. Once she saves it, she still has the blank template to use over again.

      Sunday, 10 April 2011

      Vocaroo

      This has to be the easiest way to make a voice recording and then embed onto your wiki or blog.

      Go to http://vocaroo.com/
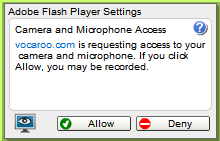
      Click on Click to Record and then click Allow

      Record your voice by speaking straight into the microphone.

      Click on Click to Stop


      Click on Listen or Record again


      Click on Post on the Internet. Copy the HTML code and then paste into the Widget on a Wiki or a HTML Gadget in a blog.

      Monday, 7 March 2011

      Visual Publishing

      I saw students publishing their autobiographies today in Word, with a border and a fancy heading. Children were working alone, typing one finger each letter as they copied from their writing books. They look bored and uninterested in what they were doing.

      Another teacher said to me, I want to do something more interesting or exciting when I get my students to publish their autobiographies, they aren't able to write much. This school has very limited access to internet, they cannot publish online so we needed to use what was available on the computer. They had Inspiration version 8! I was elated!
      I started showing the teacher how they could create a visual autobiography.
      We set up a template for students to use...
      Then we looked at how you could add pictures, Inspiration 8 and 9 have a great search feature (unfortunately the search feature is blocked at this particular school).
      Other choices of graphics are students creating their own graphics in Paint, Artrage or Kidpix.
      Or you could go to Google Images and find graphics, there are quite a few free graphic sites that show up in Google Images such as http://www.cartoonclipartworld.com/
      Use Google images to find graphics of maps and places as well.
       
      There are lots of skills children will learn 'just in time' and 'as needed' in an authentic context.

      Thursday, 25 November 2010

      Embeddable Books

      There are several embeddable book and magazine makers on the internet and this was one I came across today. Create your book in Word or PowerPoint, save it as a PDF file and then upload to http://www.yudu.com
      It embeds in this form


      Enlarge this document in a new window
      Publisher Software from YUDU

      You can click on the above link to enlarge the document. This will be a great publishing tool for children and teachers to use, I could see them making story books and magazines, embedding on to their wikis and blogs and also downloading for off line reading.

      Thursday, 10 June 2010

      'Time Wasting' Kids who take ages to finish work

      There is a very simple and effective solution to the problem of students who drag out the publishing or presenting of work on the computer...


      1. You have 'X' amount of time to do this work
      2. If you do not finish it, you print it out and finish by hand

      Do not fall for the 'I haven't finished.... I need to be on the computer again tomorrow!'

      Children very quickly decide that they don't like presenting 'half and half' work and will miraculously speed up and finish their work.

      Thursday, 22 April 2010

      Fotobabble

      I was reading a post about the iPad written by @dakinane when I saw him mention a flash based application using photos 'Fotobabble.
      With this application you can upload a photo, add your voice to it and then embed into your wikis or blogs.
      Fotobabble could be used in  many ways in the classroom

      • as an oral assessment for speeches
      • oral assessment for speaking in other languages
      • a way of publishing a piece of writing, (selecting a photo that represents the writing)
      • publishing explanations, narratives, persuasive and procedural
      • final assessment tool in presenting information
      • a linear slideshow presentation with several photos and voiceovers
      This is a great tool for the verbal/linguist student. It is very quick and easy to use

      Wednesday, 3 March 2010

      Simple but an effective way of Publishing

      A teacher said to me today that her children were always publishing in the same way, in Word with a frame and a title. She wanted to know some different ways to publish. I showed her my slideshare presentation '59 ways to publish'

      Journal Publish
      We decided to keep it simple and look at only using Word and PowerPoint. We looked at the Journal story idea. When  you look at school journals, most of the pages have pictures in the background and text overlaying the page.
      This is an example of two Word pages side by side. The photos cover the whole page, some of the photos have been lightened with the Washout button and then text has been inserted using textboxes. (Remove the background colour and line from the textbox by clicking on the Fill can and selecting 'No Fill' and the outline shape or line button and select no outline or line).

      Publishing using PowerPoint Templates

      One single PowerPoint page can be used for publishing as well. Open PowerPoint, choose a design theme.
      Select a slide layout, type in text, add graphics. Print out single page.


      You can adjust the colours of the template by
      Mac: Open the Toolbox and choose a colour theme from Document Theme


      Windows: PowerPoint 2007 choose from Colours