

Thursday, 29 May 2008
Mapwing
This is Mapwing. A programme that enables you to create a virtual tour from photos and images. Create a map background, then add pins to pinpoint areas you would like people to look at. Add photos and text (descriptions, information etc) to those areas. Embed into a wiki, or a website.
Saturday, 24 May 2008
Del.icio.us How to
Del.icio.us is one of those free sites you must have. Too many times you will have found yourself in this situation, you have bookmarked favourite websites on your computer at home and different ones on your computer at work! You sit down at the computer at work and want the bookmarked sites that are on your home computer. Del.icio.us is the website that will store all of your bookmarks in one central place so that you can access them on any computer with internet access. To set up your Del.icio.us account click on this link Del.icio.us
Click on register
type in user name. I usually suggest at this point that you might like to have 2 Delicious accounts, one for personal and one for education use. Use your own name (first and last name) as a user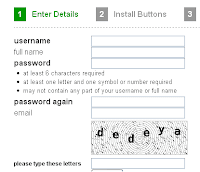 name. Type your full name, type your password twice (it must have at least one number in it). Type in your email, don't use your class one, use your private one as you will want to take this list with you when you go. Type the letters you see in the gray box, click Register.
The next win dow will install your Delicious buttons onto your browser toolbar. Safari will instruct you to click and drag the buttons up and drop onto your toolbar. The Firefox and Explorer browser will ask you to click and install extensions.
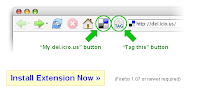 This one asks you to 'Install the Extension Now!
This message may appear saying that 'Firefox prevented this site...
Just click the Options button and click Allow and then Close
In the next dialogue box click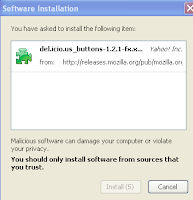 on the item you want to install, then click Install.
Once you have installed your buttons, it is best to close your browser and reopen it.
Your 2 new buttons will appear on your toolbar. This button will take you to your Delicious page and this button
 is your Tag button. When you find a website you want to book mark, click on the Tag button. A new window will open with the name of the website, the address, a place for you to add notes and tags. Add a note that explains what the website does.
  Tags are very important, tags will appear at the right hand side of your Delicious page and are an important navigational tool for you and for others who might look at your site. If it is a maths site you might consider adding specific tags such as geometry or statistics. Click Save.
These tags will need to get sorted into Bundles when you return to your Delicious page. Click on the Delicious button on your toolbar to return to your Delicious page.
If you do not bundle your tags they will end up as a long list down the side of your page. Click on the blue bundle tags link. Type in a bundle name in the new bundle box
 click Create. Type in some tags that will be added to that bundle, when you have enough tags click Save Changes
  Go back to your Delicious page and you will see your bundles and tags, (you will only see tags of the Websites you have added so far.)

type in user name. I usually suggest at this point that you might like to have 2 Delicious accounts, one for personal and one for education use. Use your own name (first and last name) as a user
 name. Type your full name, type your password twice (it must have at least one number in it). Type in your email, don't use your class one, use your private one as you will want to take this list with you when you go. Type the letters you see in the gray box, click Register.
The next win
 dow will install your Delicious buttons onto your browser toolbar. Safari will instruct you to click and drag the buttons up and drop onto your toolbar. The Firefox and Explorer browser will ask you to click and install extensions.
 This one asks you to 'Install the Extension Now!
This message may appear saying that 'Firefox prevented this site...
Just click the Options button and click Allow
 and then Close
In the next dialogue box click
 on the item you want to install, then click Install.
Once you have installed your buttons, it is best to close your browser and reopen it.
Your 2 new buttons will appear on your toolbar. This button
 will take you to your Delicious page and this button
 is your Tag button. When you find a website you want to book mark, click on the Tag button. A new window will open with the name of the website, the address, a place for you to add notes and tags. Add a note that explains what the website does.
  Tags are very important, tags will appear at the right hand side of your Delicious page and are an important navigational tool for you and for others who might look at your site. If it is a maths site you might consider adding specific tags such as geometry or statistics. Click Save.
These tags will need to get sorted into Bundles when you return to your Delicious page. Click on the Delicious button
 on your toolbar to return to your Delicious page.
If you do not bundle your tags they will end up as a long list down the side of your page. Click on the blue
 bundle tags link. Type in a bundle name in the new bundle box
 click Create. Type in some tags that will be added to that bundle, when you have enough tags click Save Changes
  Go back to your Delicious page and you will see your bundles and tags, (you will only see tags of the Websites you have added so far.)
Tuesday, 20 May 2008
Transferring Inspiration diagrams to Word or Pages
One of the lesser know features of Inspiration and Kidspiration is the 'Transfer' button. I find this a very powerful assessment tool for both teacher and student.
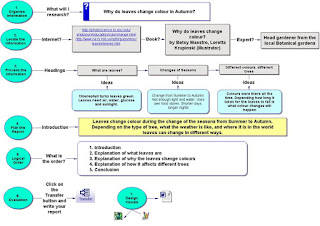
Once the student has finished their Inspiration diagram as in this 'Informational Report'
WIndows computers will transfer this document to Microsoft Word, Apple computers will give you the choice of Word or Pages. Click on your choice. Click OK in the next window (if you are using Inspiration 8 or 9)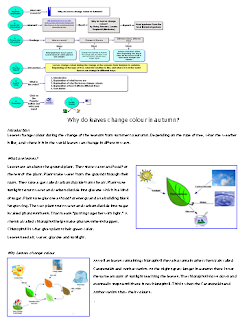 .
.
The Inspiration diagram transfers as a graphic. All of the text transfers into Word (or Pages) as editable text.Children can then manipulate the text (change font, size and style). Other graphics can be added.
This is a great assessment tool as the teacher can see what the student's original thoughts were illustrated in the Inspiration diagram and then they can see how they manipulated that information to publish the final piece.
Reading and Math Management Boards
Following on from my previous post about management systems, I had management boards for my reading and maths. These boards weren't managed 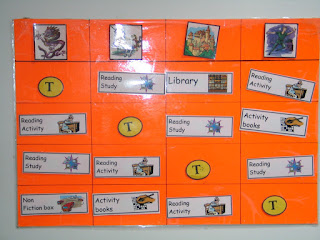 by me but were managed by the children. Several teachers I work with are successfully using this system. The reading board looks like this.
There are a variety of activities for children to do and they all know what they are doing at this time of the day. The 'Reading Study' here stands for their Computerised activity. Before I send children off to do this activity I always demonstrate it first preferably by projector on a whiteboard.
 by me but were managed by the children. Several teachers I work with are successfully using this system. The reading board looks like this.
There are a variety of activities for children to do and they all know what they are doing at this time of the day. The 'Reading Study' here stands for their Computerised activity. Before I send children off to do this activity I always demonstrate it first preferably by projector on a whiteboard.
Depending on how many computers there are is how I will organise the reading group. Two can share a computer, working on a activity together. Or 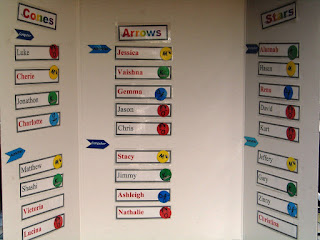 if there is less computers available I might use my label management technique. This works very successfully in dividing up reading or math groups. This is an example of the maths board. There are 3 math groups, half of the math group goes on the computer and they have allocated labels, M for mouse,
 K for keyboarding
 , D for director
  ( they tell everybody what to do), O for observer
  (they stand quietly). The other half will do related activities in their books, or complete reading games.
 if there is less computers available I might use my label management technique. This works very successfully in dividing up reading or math groups. This is an example of the maths board. There are 3 math groups, half of the math group goes on the computer and they have allocated labels, M for mouse,
 K for keyboarding
 , D for director
  ( they tell everybody what to do), O for observer
  (they stand quietly). The other half will do related activities in their books, or complete reading games.
My Maths task board looks like this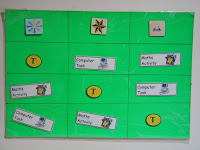 with 3 groups, and I always demonstrate the activity with the children before I send them off to do it.
 with 3 groups, and I always demonstrate the activity with the children before I send them off to do it.
Another management technique I use is to have the childrens maths and reading group folders on the desktop. Children only go into their folder  and there maybe only 2 or 3 activities available in the folder
  so that the children know that this is their folder and those are the only activities they can do. It is important that chldren know exactly what they are going to do, when they are going to do it, where the activity is and what their role is! That way everybody knows what they are doing and you are able to get on with the job of teaching children without worrying about what is happening in the computer centre.
 and there maybe only 2 or 3 activities available in the folder
  so that the children know that this is their folder and those are the only activities they can do. It is important that chldren know exactly what they are going to do, when they are going to do it, where the activity is and what their role is! That way everybody knows what they are doing and you are able to get on with the job of teaching children without worrying about what is happening in the computer centre.
Friday, 16 May 2008
Management Boards
 To manage computers in a classroom you need to have systems in place. Why do you need management systems? Mainly for sanity reasons! If there are systems in place that monitors and manages the children's time and activities and the children know how to use them then this will make less work for you.
How many times have you had children come up to you and say
"I have finished!" and then they wait for you to tell them what to do next
"I have nothing to do!"
"The computer's not going!"
"I can't hear the computer!"
"I can't find the game!"
or of course the fighting over the mouse and the keyboard. The first management board you should put in place is the Monitors Board. The rule is that 'you have to see a monitor before you see me' and if the monitor can't work it out they can ask another one until it is obvious if teacher help is needed at all. I like to divide my monitors into 3 parts of the day so that the same one is not being interrupted all the time. I always tested new games or programmes with monitors first before I showed them to the class, that way I could generally test out what things might go wrong and I could train the monitors up with how to deal with it.
This is my Writing Task Board. Everybody starts Drafting together,
 and then gradually children start moving their name labels into the Proof Reading area, they complete all their proofreading tasks and then they move into the Drafting area. There is where the potential problems could happen and this is why you need a Writing Choices board.
This is where you can have a variety of
 choices to suit the different learning styles and intelligences. It is also a place to put in some computerised activities. I always have the classroom set up with lots of learning centres around the room and there is always a typing centre with old keyboards, laminated keyboards (see my website for downloads) or I will make use of old computers for keyboarding practice. I might als
 o have a computer setup with spelling list or grammatical activity and these are always a followup to whatever I am teaching in the class.
For these types of activities you need separate management systems in place, this is where I find the Ladder system very useful. In this example all the children start off in 'Waiting for turn' and they transfer their name label to 'Had a turn' when they have completed their task.
Here are some more examples of these type of monitoring boards


Wednesday, 14 May 2008
Fotoflexer

Fotoflexer is a photo editing programme with a lot of features. You can upload a photo from your computer (resizeit so it is less then 500kb) to the website, autofix the photo or make the adjustments yourself using the Red eye, crop, adust, flip or rotate. Then comes the fun part, click on the other tabs to make changes to your photo

 This is the Effects toolbar, click on an effect and it will add the change to your photo, click Apply, click Save. It will save to Fotoflexer but will also offer other places to save such as to a Blog, Picasa, Flickr or to your hardrive. You can also email the photo, or retrieve the code so that you can embed it into a website. To save you do need to be a registered
  user. In the 'Decorate' options you can add stickers, borders, draw on it and erase parts of the photo.
Other options are adding Animations, fixing blemishes using the Beautify option, bulge, pinch, stretch and squish using the Distort option or add images on the layer menu choice. There is also a Geek option for cutting out, morphing etc.
Classroom Application:
Children can alter the images in so many ways to be used in whatever application offline or online. Some of the effects are usually only av
 ailable in expensive software.

Tuesday, 13 May 2008
'Do it instead of'...rather then 'As Well As'
'Do it instead of'...rather then 'As Well As'
That is my new motto. Part of the problem when integrating ICT into teaching and learning is that teachers are treating it as an add on! In some cases there are still classrooms that are operating with only one computer and/or another one barely working but most schools I visit nowadays have between 2-4 computers in their class.
Think of this
Instead of giving your reading or maths group a worksheet, create the worksheet in Kidspiration, Inspiration, Word, PowerPoint (or whatever you would like to use). Make one child in the group the mouse operator, one the keyboard, one writing on a whiteboard, one on a calculator or anything else you can think of, then the children can swap. You can have at least 3 children on one computer. So instead of writing on a worksheet they are working together using the computer.
Another example where this works well is in Art. Whatever the children are doing in art, someone can be doing the same thing using the computer. Artrage has pencil, paintbrush, crayon, felt tip and pastel tools. Experiment with the pencil and you can even do shading! A teacher on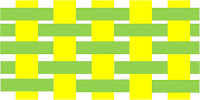 ce said to me "we are doing weaving, how can we use the computer to create a woven pattern?" My answer was 'use Word or PowerPoint with autoshapes and colours'. Find graphics with textures and weave with them. Children will learn a lot of computer skills and use a lot of problem solving doing this type of exercise.
The other important thing to remember is that not everyone in the class has to do that same activity on the computer, maybe in art this week it is this group of children, next week it is another group of children with maybe a different computerised art activity and so on.
That is my new motto. Part of the problem when integrating ICT into teaching and learning is that teachers are treating it as an add on! In some cases there are still classrooms that are operating with only one computer and/or another one barely working but most schools I visit nowadays have between 2-4 computers in their class.
Think of this
Instead of giving your reading or maths group a worksheet, create the worksheet in Kidspiration, Inspiration, Word, PowerPoint (or whatever you would like to use). Make one child in the group the mouse operator, one the keyboard, one writing on a whiteboard, one on a calculator or anything else you can think of, then the children can swap. You can have at least 3 children on one computer. So instead of writing on a worksheet they are working together using the computer.
Another example where this works well is in Art. Whatever the children are doing in art, someone can be doing the same thing using the computer. Artrage has pencil, paintbrush, crayon, felt tip and pastel tools. Experiment with the pencil and you can even do shading! A teacher on
 ce said to me "we are doing weaving, how can we use the computer to create a woven pattern?" My answer was 'use Word or PowerPoint with autoshapes and colours'. Find graphics with textures and weave with them. Children will learn a lot of computer skills and use a lot of problem solving doing this type of exercise.
The other important thing to remember is that not everyone in the class has to do that same activity on the computer, maybe in art this week it is this group of children, next week it is another group of children with maybe a different computerised art activity and so on.
Monday, 12 May 2008
Kerpoof - Motivate children's writing
 Kerpoof is a great piece of software that you can use to motivate
children's writing. It is free, colourful and interactive.
Make a Picture - choose a background and make a picture using the graphics provided, use the text button to add text to the page. Print the page out as full A4 or as a card. You can also choose to print it out in full colour or as a colouring book page
 .
. Make a Movie option allows you to create a movie with moving objects. 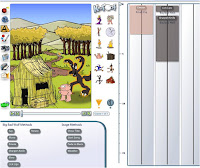 There are 7 different story lines to pick from, several scene pages and a limited amount of graphics for each page. Choose from the animation list to animate the objects. Text can be added to the scene as well. It can be saved to an account at Kerpoof or printed.
 There are 7 different story lines to pick from, several scene pages and a limited amount of graphics for each page. Choose from the animation list to animate the objects. Text can be added to the scene as well. It can be saved to an account at Kerpoof or printed.
Make a drawing has drawing tools where you can create a picture and print it out.

Make a card has 8 preset cards including Birthday, Thank you etc. with a limited set of graphics to add.
The Make a Story is my favourite option with 19 different scenes, 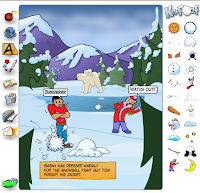 some graphics, text boxes and text speech bubbles. You can also add more scenes to the story.
 some graphics, text boxes and text speech bubbles. You can also add more scenes to the story.
 This would be a great site for those children who don't have anything to write about as it provides the scenes and graphics, but they get to add the words. They can manipulate the graphics and can add their own drawings to it by using the pen tool. It prints out beautifully as well.
Computer skills and writing
I was talking to some teachers today about how to bring in computer skills while teaching writing.
- Keep your laptop or computer close by to your whiteboard where you are modelling writing
- when you are talking about capital letters, ask "How do you make a capital letter using the computer?" (Shift and opposite hand for the letter)
- "What fingers do I use to make a full stop?" (ring finger on right hand)
- "How do you make a space?" (one press on the space bar with your thumb)
 whatever your teaching point is in writing think about how the children would need to do it in a word processor and make that a computer teaching point i.e. "What is a synonym for the word 'nice'?" (right click on the word and select synonyms in the sub menu)

Remember 'Whatever your teaching point is in Writing could also be a computer skills teaching point!'
VoiceThread
Voicethread is a collaborative space of group conversations.
The example below is created by a student called Zoe in America, she designed it around her interest in Global Warming.
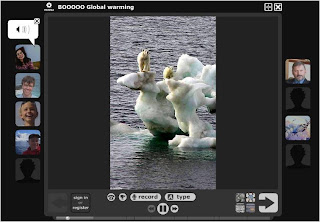
A VoiceThread can be created using documents, videos and photos. Comments can be added by registered users by text or voice.
The example below is created by a student called Zoe in America, she designed it around her interest in Global Warming.

They can be exported to your computer as a widescreen movie and to wikis, blogs and webpages. You can use a variety of images: JPG, GIF, BMP, PNG; docs: PPT, PPS, PDF, DOC, XLS; and videos. If you've got a Flickr account, you can import from those as well.
It has a 'doodle' feature which means you can draw over the images to make a point while you are recording your voice.
Classroom Application:
a way for children within the class to collaboratively present
It has a 'doodle' feature which means you can draw over the images to make a point while you are recording your voice.
Classroom Application:
a way for children within the class to collaboratively present
- an investigation
- book report
- any writing genre (recounts, reports, explanations, descriptions, procedural etc)
- technology challenge
Subscribe to:
Posts (Atom)