Showing posts with label Word. Show all posts

Wednesday, 3 March 2010

Simple but an effective way of Publishing

A teacher said to me today that her children were always publishing in the same way, in Word with a frame and a title. She wanted to know some different ways to publish. I showed her my slideshare presentation '59 ways to publish'

Journal Publish
We decided to keep it simple and look at only using Word and PowerPoint. We looked at the Journal story idea. When  you look at school journals, most of the pages have pictures in the background and text overlaying the page.
This is an example of two Word pages side by side. The photos cover the whole page, some of the photos have been lightened with the Washout button and then text has been inserted using textboxes. (Remove the background colour and line from the textbox by clicking on the Fill can and selecting 'No Fill' and the outline shape or line button and select no outline or line).

Publishing using PowerPoint Templates

One single PowerPoint page can be used for publishing as well. Open PowerPoint, choose a design theme.
Select a slide layout, type in text, add graphics. Print out single page.


You can adjust the colours of the template by
Mac: Open the Toolbox and choose a colour theme from Document Theme


Windows: PowerPoint 2007 choose from Colours

Friday, 22 May 2009

Creating Comics in Word


I was working with a teacher today who said he was going to make comics in Word.

To make it look more like a comic, upload your photos to Befunky and cartoonise them. Click on Get Started, click on Cartooniser, click on Browse files, select a photo, click Open, rotate or crop if necessary, click OK and your photo will appear. Click Save, name your photo and click Save to My desktop, click OK you may be asked to Save again. You may want to crop the white border of the photo


I had previously already showed him how to insert Autoshapes onto a page, I usually insert six to a page. Then you click on a shape, go to the Fill can, choose Fill Effects, click on the Picture Tab, click on Choose Picture, select a photo and click Insert.


Once the pictures are inserted then you need to add the speech bubbles and narrative text boxes. This is a wonderful way of publishing children's writing.


You can also do the same thing in PowerPoint but put one photo on each slide and it becomes a Comic Slideshow.

Tuesday, 3 March 2009

Organising Activities for Reading and Maths

If you have made some group specific activities in Kidspiration, Inspiration, PowerPoint, Keynote, Word or Pages, then you need to make them easily accessible. One method that used to work well for me and that I have introduced to many teachers is to make your group folders i.e. for Maths, they might be called, 'Squares, Hexagons, Triangles' and leave them on the desktop. Copy the files/activities for the week into the folder. Teach students how to find their folder and the activities. For Maths never put more than 5 activities into their folder. If there are fast finishers make a 'Fast Finisher' folder with activities they have completed in the past, sometimes I will choose ones like Time, Measurement and Geometry for maintenance practice.


You can also include Interactive Worksheets in Word, Pages, PowerPoint or Keynote with hyperlinks to the activities in that folder or to websites. This example to the right has been created in PowerPoint, and the screen captures are pictures of the actual online activity. These games are linked to the websites as a follow-up to what has been taught in Maths that week.

The following example has been created in Word. This is an interactive Reading worksheet with links to Inspiration activities and space to record their answers.


And this is one of the examples of the Inspiration worksheets the above Word document links to.

If all of the related files are kept together in the same folder then you will not have any trouble accessing all of the files. But do remember one thing! When creating activities for students, save them as templates! If students have to save their work for it to be marked, teach them how to save to their own folder.
Interactive PowerPoints that hyperlink to games do not need to be saved by students. The only things that need to be saved is when changes have been made.

Before I send children off to complete activities, I always go over the activity I expect them to complete. Don't assume that they know how to do the activity i.e how to click on a hyperlink. Talk them through how they are going to do it and especially if they need to save a copy to their own folders.

Tuesday, 10 February 2009

Things I like about the mimio #1 Converting ink to text

I have had a mimio to play around with for the last month and have now written a 'mimio Manual' which is available on my Website. I am also going to be offering mimio specific courses so keep an eye out on my course page. There are many specific things I like about the mimio so I am going to itemise them in this blog. The first one is 'Converting ink to text', and 'Converting writing to text. Unfortunately this is not available for Mac yet, but it works well on Windows.


Converting ink to text
Click on the Ink Pen
. Write your text. Click on the Selection tool. Click and drag around the ink text. It will turn into this

Right click on the selected text and select Recognise Ink or go to Tools in the menu and select Recognise Ink. . The ink is converted into text.


Converting writing to text

Before you start you need to activate yo
ur computer keyboard.
Click on the Applications button and select Text tools

A keyboard will appear that you can use with the mimio pen.
Close it by clicking on the . It will appear in your system tray.

Using the mimio pen click on the Text button, click on the page to place the text box.
Right click on the Keyboard
in your system tray. Click on Write Anywhere or Writing Pad (Write Anywhere is not available on Vista)
If you are using the Write anywhere, you can write anywhere on the screen (make sure the cursor is in the Text box first) when you stop writing it will appear in the text box. If you use the Writing Pad then you have to write on the line in the pad, again every time you stop writing with the pen the ink will convert to text.

What I particularly like the most about Converting Writing to text is that you can use it in other applications as well such as Inspiration, Kidspiration, Word and PowerPoint. Just open the mimio Tools and then the Application you want to use.
Remember it will not work until you place your cursor in a text box, symbol or a page.

Tuesday, 18 November 2008

Kidspiration, Word and Projectors

No Interactive Whiteboard or Internet access, what could she do?

I was in a class yesterday where the teacher was really keen to use her laptop and the school projector in her classroom teaching. I showed her how to set it up and we decided where was the best place to put it. Of course the projector is not suspended from the ceiling...it has to sit on a table, but we could work with that. And we had to use extension cords, so duct tape was used and new rule in the class imposed "Walk around the table rather then through the gaps!"
Next was the discussion of how to use this as a learning tool.

First of all we looked at the Kidspiration math activities that are available on the school server. These types of activities can be used as a teaching tool. Because we were projecting onto the whiteboard the children could go up and write the answers with whiteboard markers (which they love doing)and the teacher could also get children to come up and type in the answer.

And of course Kidspiration is a great authoring tool, very simple to create your own activities and if you are still using Version 1 or 2 then you must upgrade to Version 3 as it has a folder dedicated to great math activities that you can adjust to suit your class and a new view which gives you maths tools to create activities with.

So using the laptop and the projector for maths was easy... What about writing?

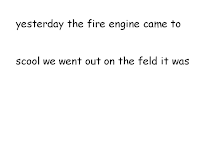
We talked about how she models her writing on the whiteboard in the class so I suggested that she use 'Microsoft Word' and the font Comic Sans with a large font size so that all children can see it.
It is a good idea while you are modeling the writing to turn off the capitilisation, (2007 go to Menu Button and select Word Options, click on Proofing, click on AutoCorrect Options, deselect Capitalise first letters of sentences, click OK) (2003, go to Tools, click on AutoCorrect Options, deselect Capitalise first letters of sentences, click OK)
Students can make corrections using white board markers. This is also a good opportunity to teach keyboarding editing skills, as you do the editing say what you are doing "I need to fix up a spelling mistake so I am going to take my mouse and click at the end of the word scool and I am pressing the Backspace key, now I am typing in the correct word". This is a common editing mistake I see children doing, instead of going and clicking on the word to correct it they will backspace a whole sentence , therefore wasting time as they have to type the sentence again. And of course this is great time to remind children what fingers they should be using, such as "What finger do I use to make a full stop?" Have a couple of old keyboards available so that children can pass them around and practice making the full stop with the ring finger on their right hand.
So even without Internet access there is still a lot of ways you can use a projector and a laptop!

Tuesday, 16 September 2008

Reluctant Writers and ICT

Some children just have nothing to write about, their imagination is stifled and they think they have nothing to write about. There are many reasons for this but one I would presume to say is that a lot of students are visual learners, not necessarily visual thinkers (their imagination has been stifled or ideas have been imposed on them).This is where computers can help...at any age level. I am not particularly advocating that they type (or draft) their story using the computer but instead use the visual aids available to

BUILD A STORY

Use Programmes like KidPix, Kidspiration, Inspiration, Pages, PowerPoint or Word, anything that allows access to a graphic library and get the students to build a story using the graphics available to them. They can then then move them around and create a visual story from the pictures they have found. This visual story can be printed out and used for the motivation for writing which could then be drafted in their writing books.
Another idea would be for children to record themselves on an iPod, PDA or a tape recorder talking about their visual story and this can then be played back to them as they are writing.