Cissy from
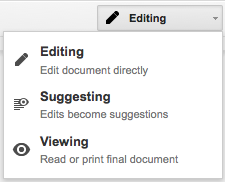
Flatbush School asked me an interesting question today that took a little thinking on my part. She has been using the 'Suggesting' part of Google Docs while her students are writing their stories.
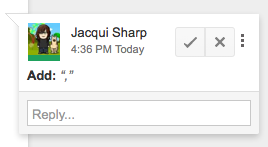
The only problem is that once the students edit their work and click the tick, you cannot see what 'marking' the teacher has done.
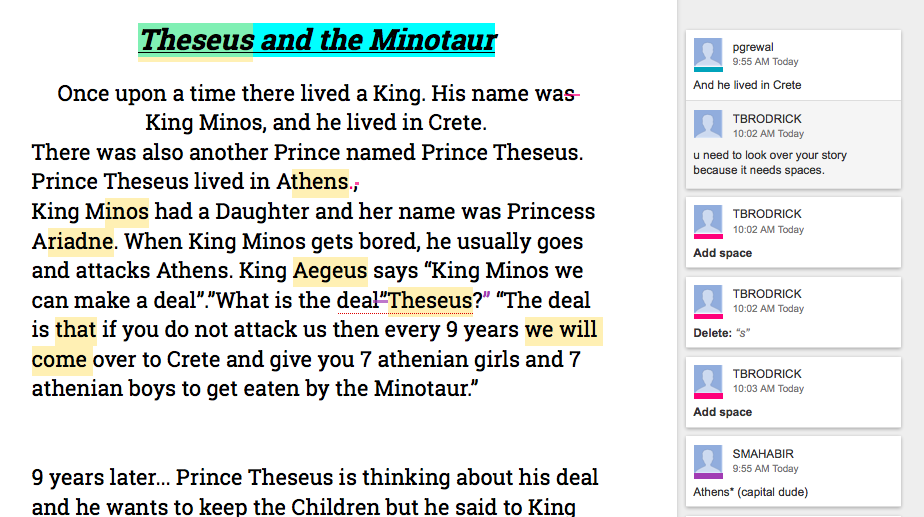
Marking by the teacher before the student edits it looks like below
When the students click the tick and resolve comments (which of course they want to do so that they can publish their edited work) it looks like this...
All of the comments and suggestions by the teacher disappear.
Cissy's problem is that she wants to be able to access the student's work showing her marking (evidence of what she has been doing with the student), as well as the student edited doc. But the students are fixing their mistakes as quickly as she is marking them.
I suggested using 'See Revision History' under the File menu. She could open that, click on the revision where she had made the changes and view the changes. If she needs to print it out, she will need to click on 'Restore this revision' then print. To see all the marking printed out, you can go to File - Download as Microsoft Word. This will show all the marking as red markups on the Word Document. To get the finished edited version back, you need to click on 'See Revision History' and then click back on the version before.
This is useful to know as teachers are accountable for student learning and this is one way of proving teacher input.


 I like to create my own graphics and I used to spend hours drawing them on my iPad from scratch. Then I found Adobe Illustrator Draw,


 If you are making instructions and have taken a screen capture somewhere on your computer (Windows use Snipping Tool, click and drag around what you want to use and choose Copy) Go back to Doc and Paste.