In Term Two 2013 I demonstrated teaching in an e-Learning class for 2 weeks in a Year 5/6 room at Clevedon School. This post is about how the students used iPads (and other tools) in Writing.
As I plan the work students will be doing, I am always thinking of
- How could I introduce this to students in a visual way?
- What choices of tools, ideas, activities could I make available for them?
- Am I covering different student learning styles?
When I am in the classroom, I like to ask the students how they like to learn and what are their favourite activities. From that information I add other options to the choices they have.
I personally think that students should have options of how they want to do their work and some of those options are explained further down the post.

On the first day I worked with a couple of groups showing them how to download their Inspiration mindmap '
Narrative Writing Framework' ready for tomorrow and they then went on and taught others in the class.

I made the framework in
Inspiration 9 on my computer and then exported it to Inspiration Maps on the iPad. (If you don't have Inspiration 9 on your computer you can still make your frameworks in Inspiration Maps) I provided a link to the download on the
class wiki. I had showed the students how to make a website link on their iPads so that they could access the wiki quickly by loading the website in Safari, tapping on the Share button and tapping on Add to Home Screen. It will appear as an app on your iPad.
We talked about introductions and setting the scene for writing and I demonstrated using the
Narrative framework and the Myths and Legends Narrative Walkthrough I had uploaded to Slideshare and embedded on the
Wiki Writing Page. Students used the Inspiration Map as their drafting template and when they had finished they shared and opened in Pages for crafting and editing.
 Day Two
On the second day I managed to see all of the writing groups at different times to
show them their Proof Reading/Assessment which was created in Google Docs.
Before they are ready to conference with me they have to have looked at the 'Have I...' table and check off that they have attempted or achieved all of the goals.
Because this document was in a table, students had to go to Safari, Chrome or Puffin to edit Google Docs as a Desktop version. They could view the table in the Google Drive App.
On further reflection, I would not use tables in Docs until Google Docs have updated them to be used seamlessly on an iPad.
Day ThreeStudents are gradually understanding the Writing Charts of Drafting, Conferencing and Publishing. They know not to put themselves on Conferencing if they haven't checked off their 'Have I...' chart. And they are learning very quickly that if I see any missing punctuation they have to leave the Conferencing group immediately and work on it.
Below are some of the choices they can make for Drafting, Conferencing and Publishing.
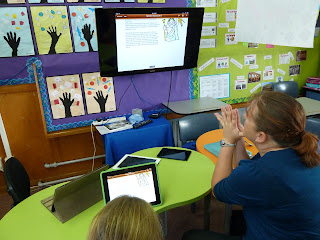
This was the first time I worked with a conferencing group using the Apple TV and TV set. It was perfect for the job. Students were able to mirror their work to the TV, and the other children were able to peer edit it for them with a little input from me. I had their group learning intentions and success criteria on my iPad in front of me and was able to keep referring students to what they had to concentrate on.
 Day Four
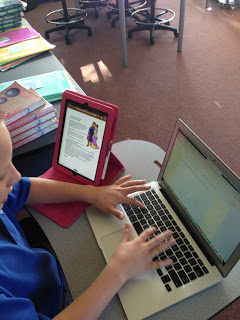
 One of the students finished her writing today so she was able to
publish it to our Myths and Legends blog.

In this photo she has her edited draft open on her iPad and she has transferred it over to the laptop to paste into Blogger and add some pictures.
Later I made the Blogger App available to students so that they could add to the blog from their iPads.
The clipart she has used comes from the fantastic
mrdonn.org website which is full of wonderful resources
and free clipart for children. Eventually students will start creating their own clipart. They have learned how to create clipart using Keynote on the iPad and at the end of each day I give them quick 5 minutes lesson on how to draw cartoons. I use 'How to Draw Cartoons' by Brian Platt ($2.99
Kindle on amazon.com)
The apps the students used for practising their cartoon drawings were Paper 53 or
Crayola Paint & Create
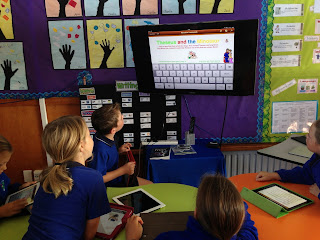
This photo shows the students peer editing using the TV and AppleTV. They have mirrored their iPads to screen.
They also discovered to their amazement that they could mirror their mac laptops and iMac as well!
After talking about Vivid Verbs in writing, the children set to their work. A few students have started on their second story and lots are ready to conference and publish. Several have posted to the
'Myths and Legends blog' and some are working on Book Creator. Here is one example of a finished book.
Students are using the Writing task boards well. Some of the students are on their second round of writing stories. When it comes to publishing, they are loving the choices they have.
Several more children were publishing today. They really like using
Book Creator. I reminded them that they could create their own graphics while they were waiting to conference with me which means they can use Sketchup, Minecraft, Pages shapes or any app they have on their iPads.
Students are now starting to get into the habit of checking their
Writing Assessment Doc when they are proofreading their writing.
What I have particularly enjoyed in my time at Clevedon, is having the opportunities to look at how children learn, identify what are some of the difficulties they have and thinking about the 'what' and 'how' I can assist them. An example is using the Telescopic Text last
Friday which has helped the students to think about expanding their sentences using more adjectives and verbs. Some students are having difficulties sequencing their myths and legends so tomorrow I am going to get them to screen shot or copy the text from an original myth, insert into Notability and let them use the highlighting and pen tools to identify all the different parts of the structure of the story, then they will use the
Narrative Framework to plan their writing.
It's not all about iPads!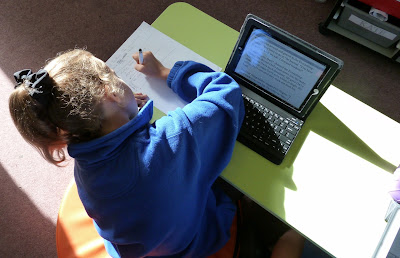
This student is reading her next Myth and 'writing' down the facts/information on a piece of paper!
 Day Seven
I tried out a couple of new ideas today with the students. I noticed that some of the students were having problems sequencing in order and identifying the main points in a story. I ran a workshop session where they copied the story
Dionysus and Ariadne from the website and pasted into Notability.
I then showed the
Narrative Framework on the Projector which has been made in Inspiration.
I asked the students to highlight 'Who' were the main characters in Green.
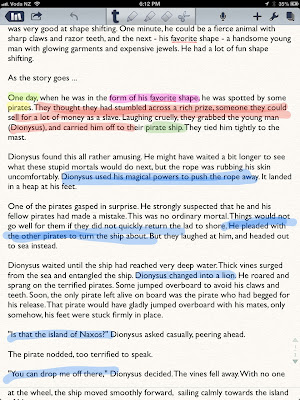
They then had to highlight the 'Where', 'When' and 'What' in different colours. After that we identified what the main problem/conflict was by highlighting in red. We then went on to highlight in blue the main points in the story and finally the conclusion in a different colour. At first students wanted to highlight whole paragraphs, but after discussion we were able to identify just the main points. They can use this information to fill in their Narrative Framework. From there they can add more detail and eventually share it to Pages for final editing. A target group of children will be expected to do this every time they start writing a narrative on a new myth or legend.
Most of the students like to publish their work in Book Creator, but from tomorrow I am going to introduce them to more ways. I am going to take one student's piece of writing and present it in several different ways. As they decide what they want to use, I will only show those students how to get started and they will become my teachers for the rest of the other children when they are ready to learn how to do it.
Below is a Slideshare I have created that shows different ways students can publish the same piece of writing using one of the student's own writing as an example.
Sometimes an iPad alone is not enough (4 devices, 2 students!)The parents came in today and were able to see the children at work. They were able to see students
- writing in Graphic Organisers
- editing by developing their ideas in Pages
- proofreading by checking their learning intentions and success criteria
- publishing in a variety of ways
- observing the teacher as she held conferencing sessions with the students as they talked about their writing
So over a two week period a variety of apps were used and the students became very proficient at using them to create their writing. Laptops were used quite extensively as well which indicates that iPads alone are not enough. In this post I have mainly concentrated on iPads but if I was full time in the class there would be a balance of non digital writing and creation as well because it is a choice that is available to students.
What didn't work so well?:- Tables in Google Docs. If you want students to edit easily then do not put tables into your docs
What worked really well?: - students having access to their Writing Assessment so that they could check off that they were following their success criteria
- mirroring iPads through Apple TV onto the TV screen and a group of students peer editing
- showing a small group of students (in less than 5 minutes) how to do something with an app and then they teach the other students
- having the links to the Graphic Organisers on the class wiki page
- students having a quick access link to their Assessment and to the wiki on their home screens of their iPads
- students having a choice about the tools (digital or non digital) they are going to use for their learning

 Previously I had shown her Matthew Thomas's app 'Tens Frame' and so she used it in her teaching session. The special needs boy picked up the strategy first time using the iPad and the rest of the group got it very quickly as well. She was astounded by this and has continued to use the app with all her students with fantastic results. When I asked her what she thought made the difference, she was not sure but she said that the monsters on the counters appealed to the children.


