Wednesday, 25 February 2009

Computer Troubleshooting in the Classroom


At the Learning@school conference I was talking to some West Auckland teachers about computer management in the classroom. One of the problems that teachers find that students have at the beginning of the year is computers not going, screens off, power supply not connected or what to do when the computer stops working. The best way to deal with this is to set up a trouble shooting guide or flow chart for students to follow when things go wrong, so if the students follow those steps and still have problems, then they must go to the Computer Monitor, and if that doesn't work, then go to the teacher. It is all about developing students independence and problem solving.

Thursday, 19 February 2009

5 Question Thinker Key

This is the answer 'Solar System'. Write 5 questions where 'Solar System' is the answer! Sound easy? The first couple of questions might be, but after that you will start to dispute what you have written. This is a great collaborative group activity where you will be sure of plenty of discussion and argument especially if the students start thinking about other answers for the question. This is actually an example of a 'closed answer...there is only one answer; but to create the question to get to that answer takes a lot of thinking and synthesising.

Graphic organizers such as Kidspiration or Inspiration or online versions such as bubbl.us or Webspiration are useful.

Key Competency 'Managing Self' and PowerPoint


I was working with Karuna and his main goal is to have the children in his class use the digital cameras more and to add the photos to PowerPoint. He has decided to integrate this into the 'Managing Self' Key Competency.
His students are going to take photos of each other doing the usual things they do in class and outside the classroom. They will then insert a photo into each slide of a PowerPoint with the success criteria for each specific competency.
When the students have finished typing in their criteria and inserted their photos then they will print it out in 3 slide view.
This can then be displayed and students can 'mark off' each criteria as they achieve it stating how they accomplished it.

Wednesday, 18 February 2009

Integration of ICT into the classroom - What I couldn't do without!

I was invited to present 3 workshops at a mini- conference. When I asked them what they would like me to talk about they said 'ICT in the Senior School, ICT in the Middle School and ICT in the Junior School'. So I thought the best way to tackle this is to talk about 'What I couldn't do without' in my classroom teaching.
Below are the 3 different workshops. I have embedded the Scribd ones for those not blocked from it (because they look better in that format) and I have included the Slideshare example as well, to view full screen click on

ICT in the Junior School ICT in the Middle School ICT in the Senior School

Tuesday, 17 February 2009

Setting up your mimio and laptop from scratch

Steps to setting up your mimio

Connect projector to laptop, turn on the Projector and the laptop

Stick the mimio to the whiteboard with the suction cups (there are plastic clips available that enable you to have a permanent place on the whiteboard, just clip the mimio into them)

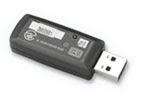
Plug in the wireless receiver or connect the USB end of mimio to your computer

Press the power button on the mimio
Press the calibration button


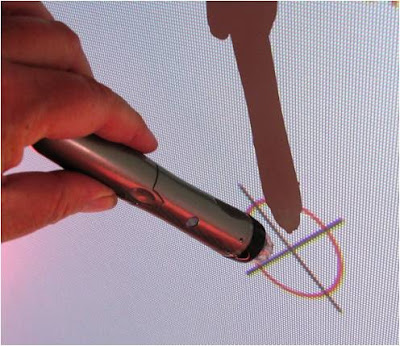
Use the pen to click in the centre of each circle (there are nine)

As long as your projector or screen doesn't move the calibration should stay the same.

Hint #2 pens and batteries again


Check to see if your pen's battery is 'still alive' by pushing the tip, you should hear a buzzing noise. If you hear that, your pen is working! If you hear nothing then change the batteries. Invest in some rechargeable batteries and always have a spare set available for your pen and your mimo. There is nothing worse than going to start your lesson and you have to find batteries before you even begin! Just a note for NZers, if you break the pen a new one is going to cost you NZ$100

Thursday, 12 February 2009

Key Competencies Start of the Year - Circular Photos


Anne wants her children to write what their goals are for the year around the Key Competency 'Managing Self'. She wants to insert their individual photos into a flower shape. Students will highlight what they have achieved throughout the year.

Mac Instructions

With Macs you can use Word, insert the photo, click on the photo to see Picture Toolbar (if that is not there then go View-Toolbars- Picture). Click on the Circle selector tool, drag around the child's face then click on the cut out tool.
Or you can use iPhoto. Click on the photo to be changed. Click on the Edit button. Crop the photo until you can see just the face. Click on the Effects button. Select Matte, click Done. Insert the photo on to your page.

Windows Instructions

Only Word 2007 has the circle cutout option, insert the photo, click on the photo, click on the Format tab, select the circle shape, then you may need to crop so click on the Crop button and click and drag a corner until you see as much of the picture as you want.


Downloadable software (Win only)
Photofiltre
http://photofiltre.free.fr/download_en.htm is a free photo editing programme. It is very simple to use and has some wonderful filters that make amazing changes to photos. You can also use it for cropping shapes out of your photos. In this example the circle tool button has been selected and clicked and dragged around the face. Go to Image - Crop and the new image will appear, go to File - Save As and name your image.

Online Photo Editing
Or there is the online version you could use for both Mac and Windows.

LunaPic is online photo editing software. Click on Browse (find your photo on your computer), click on Upload now. Crop the image first if you need to by clicking and dragging around the area of the photo that you want to keep, then click Crop. Next click on Effects in the menu bar and select Cutout Shape. On the dropdown menu select Circle and Apply. Then click Download and Save.

Shape Circles
Once you have the face shape sorted out, you need to insert a circle shape,

in Word click on Autoshapes and select a Circle. Click and drag on the page, right click (or Ctrl click Mac) and select Add Text. Type in your statement. Set your font and style. This circle will need to be moved to the back of the Photo. Click on the circle to select it, go to the Draw toolbar - click on Draw - Arrange - Move behind Text.
Now Duplicate that shape by pressing Ctrl D (Command D for Mac )on the keyboard, keep duplicating until you have enough petals, move into position and edit text.

Tuesday, 10 February 2009

Things I like about the mimio #1 Converting ink to text

I have had a mimio to play around with for the last month and have now written a 'mimio Manual' which is available on my Website. I am also going to be offering mimio specific courses so keep an eye out on my course page. There are many specific things I like about the mimio so I am going to itemise them in this blog. The first one is 'Converting ink to text', and 'Converting writing to text. Unfortunately this is not available for Mac yet, but it works well on Windows.


Converting ink to text
Click on the Ink Pen
. Write your text. Click on the Selection tool. Click and drag around the ink text. It will turn into this

Right click on the selected text and select Recognise Ink or go to Tools in the menu and select Recognise Ink. . The ink is converted into text.


Converting writing to text

Before you start you need to activate yo
ur computer keyboard.
Click on the Applications button and select Text tools

A keyboard will appear that you can use with the mimio pen.
Close it by clicking on the . It will appear in your system tray.

Using the mimio pen click on the Text button, click on the page to place the text box.
Right click on the Keyboard
in your system tray. Click on Write Anywhere or Writing Pad (Write Anywhere is not available on Vista)
If you are using the Write anywhere, you can write anywhere on the screen (make sure the cursor is in the Text box first) when you stop writing it will appear in the text box. If you use the Writing Pad then you have to write on the line in the pad, again every time you stop writing with the pen the ink will convert to text.

What I particularly like the most about Converting Writing to text is that you can use it in other applications as well such as Inspiration, Kidspiration, Word and PowerPoint. Just open the mimio Tools and then the Application you want to use.
Remember it will not work until you place your cursor in a text box, symbol or a page.

Friday, 6 February 2009

Webspiration gets better and better...


Webspiration is Inspiration online. It is in beta now and free, so use it while you can. You do not need Inspiration on your computer, and you can work on documents online. When you are on a computer that does have Inspiration loaded on it then you can download the document to your computer.


I can see students using this by uploading a teacher/or their own prepared template to their own Webspiration account; working on it online at home; coming back to school and downloading it for marking or sharing. If students have their own accounts they can also collaborate on documents together online.

Documents can be embedded for viewing in blogs and wikis, click on the document window to see a blown up version.


R rating: None that I could find

Monday, 2 February 2009

Teacher Integration of ICT into the Curriculum

Where are you on the continuum of ICT integration into the curriculum?
Whenever I start Professional development in a new school I like teachers to identify where they are at on the Teacher level of integration.

Using ICT in the classroom means a change in teaching style. The following slideshow gives a description at each level. Which one of those teachers are you? This is best viewed at full screen, click on the full screen icon